Math Monday: Linkages, Part 3: Four Bars, Two or Three Positions
by Glen Whitney
[sharethis]
Last time we saw the complexity of what seems like a pretty simple mechanism: four bars, connected at their ends in a loop. What can one do with that complexity? Well, if you are designing a mechanism, you might want one piece of that mechanism to visit various locations in turn, as the mechanism executes its function. The mathematical question becomes how you determine the linkage that visits the desired locations. So let’s take a look:
Two locations
It turns out that if we just specify two locations for a bar, there is always a simple rotation of the plane which maps the one location to the other, as this diagram (and Geogebra worksheet) show. (Technical note: it might happen that it’s actually a pure translation that moves the bar from one position to the other. But that can be thought of as a rotation about a point “infinitely far away”, so it’s not really that much of an exception.)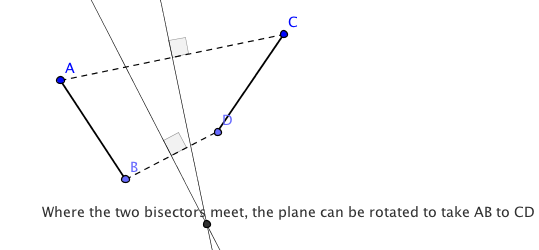 Translating this to our four-bar linkage, we can connect that point of rotation to the two ends of the moving bar, and the fourth, fixed bar of the linkage shrinks down just to a fixed point. We apply this result to the upright and the crossbar of a large letter “T” in the next recipe:
“4-bar” T linkage
Ingredients: A 27-bar (A), 34-bar (B), and 12-bar (C); two two-ply linking sticks and one three-ply linking sticks; and one spacer.
Directions: Link A to B to C and back to A. Note you will need a spacer at the A-C joint in order for both bars to be planar. (The spacer is at the same height as bar B, with one of A or C above and one below.)
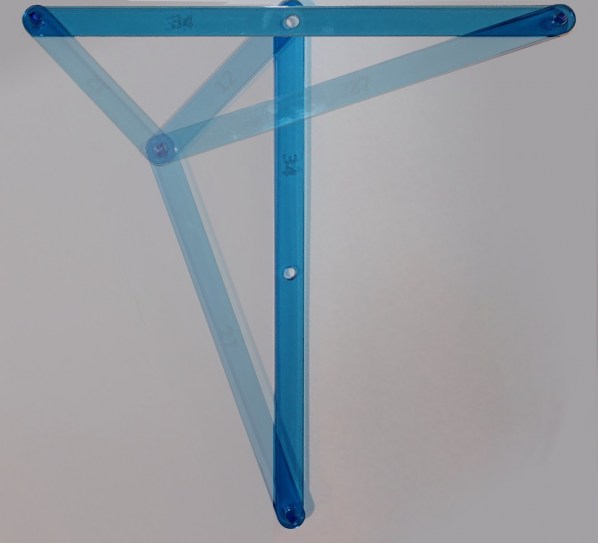
Your linkage should look like this: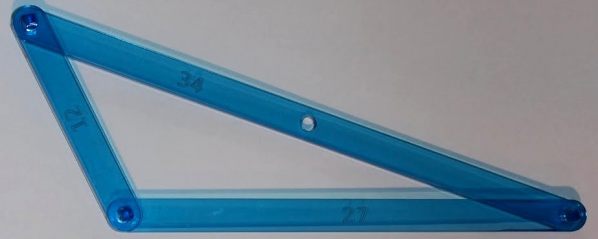 How to use: fix the A-C junction at a point so it is free to rotate. Position the linkage so that the 34-bar is perfectly horizontal. Now rotate it 90 degrees to the right. The top end of the 34 bar is now exactly at the midpoint of its former location, i.e. the two positions of the 34 make a letter “T”. The bar lengths were computed, using the construction above, to arrange that letter T. Here are the two positions of the linkage, superimposed with the GIMP:
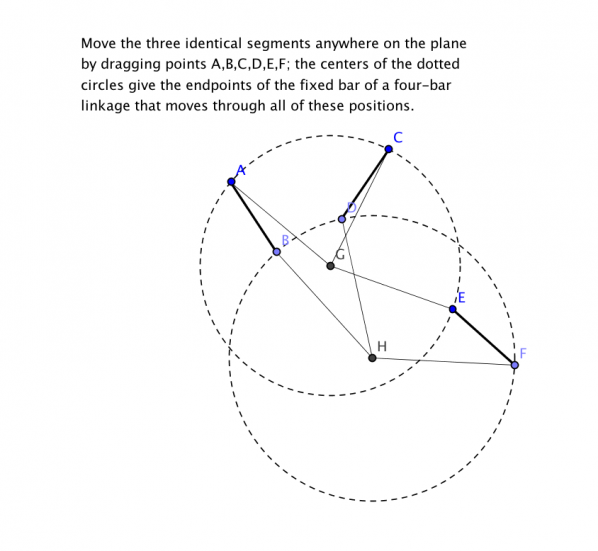
 OK, if we only used three of the four bars to achieve two positions, we clearly have capability to spare. Can we achieve any three arbitrary positions for one of the bars, which we will call the “floating bar”? For example, could we make the floating bar successively take the positions of the three strokes of a letter A? Indeed, we can. The key in this case is to recognize that with one fixed bar, the free endpoints of each of the other two bars which are linked to the fixed bar must travel in a circle (that’s the “siamese compass” mentioned last time). Therefore, we need to find one circle that goes through the three corresponding positions of one of the endpoints of the floating bar, and another circle that goes through the three positions of the other endpoint of the floating bar. Since there is a circle (or technically, sometimes a straight line) through any three points, we can always do this, as the following diagram and Geogebra worksheet show:
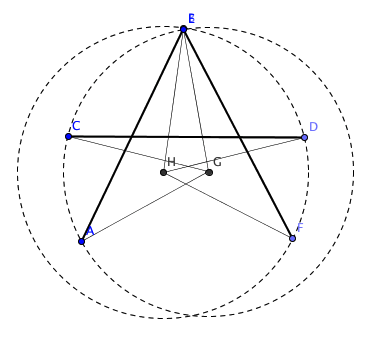
 And here is the diagram with the segments moved to mimic the the three strokes of an “A” (note that points B and E are now superimposed):
 This leads to our next recipe:
4-bar A linkage
Ingredients: A 16-bar (let’s call it Z this time, to avoid confusion with all of the other letters floating around), two 40-bars (Y and W), a 60-bar with a 30-hole (X), four linkers, and a pen.
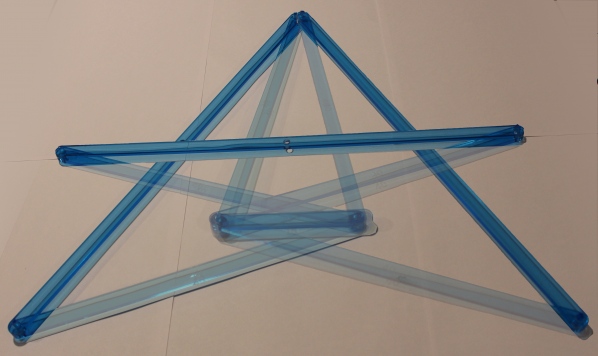
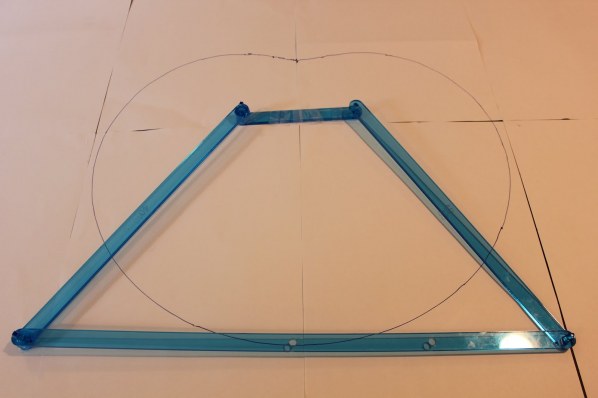
Directions: Link Z to Y to X0; link X60 to W; and link W to the free end of Z, crossing over Y. Optionally put a pen through X30. Your linkage should look like this: To use: Fix Z horizontally, and rotate Y to move X successively into the three positions shown above. Here they are superimposed:
 Incidentally, if you put a pen in the center hole of the floating bar and trace it all the way around, you produce this lovely cardioid:
 Next time we’ll try to push the limits of the four-bar linkage.
This article first appeared on Make: Online, August 13, 2012.
